×

Unity Collider Optimizer

Optimizes Mesh & Polygon colliders in Unity.

Polygon Collider Optimizer

Original Sprite Unity Polygon Collider Optimized Polygon Collider
Path Count 213 paths 23 paths

The tool uses a C# implementation of the Ramer Douglas Peucker Algorithm to smooth the polylines and reduce the number of paths created by a Polygon Collider in Unity.

Usage

  • Download the collideroptimizationpackage_2d_v004.unitypackage package from the Releases.
  • Import all the assets from the package in your unity project.
  • Attach the PolygonColliderOptimizer.cs script on your 2D sprite.
  • Adjust the optimizationFactor to control the amount of optimzation you need.
  • Run the performance comparision test on your machine by cloning the project & going to the Polygon Collider Optimization Test scene in Unity.

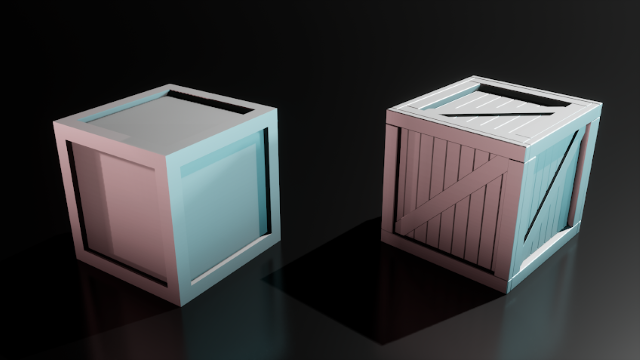
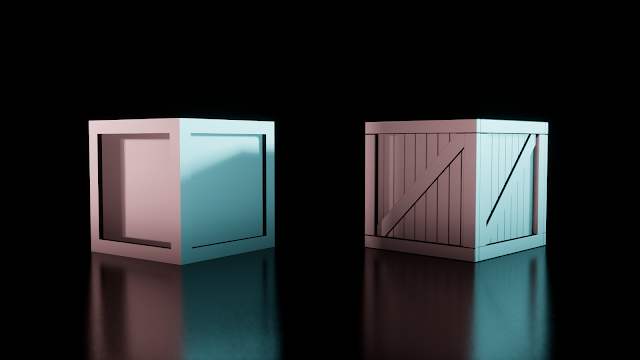
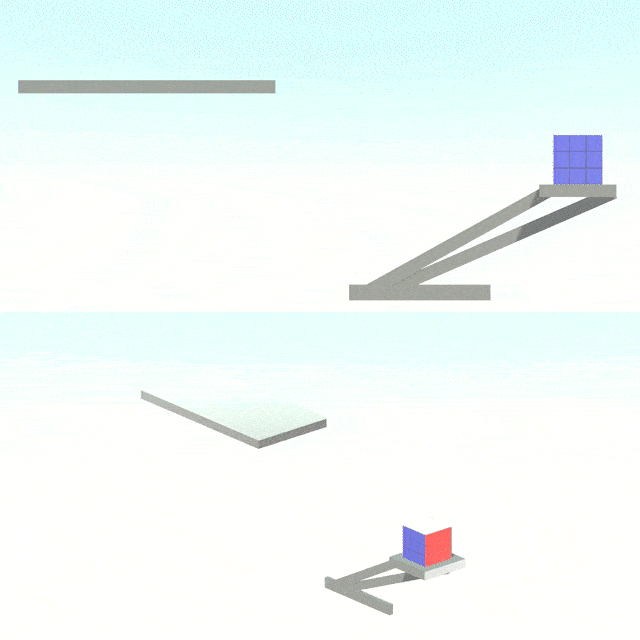
Mesh Collider Optimizer
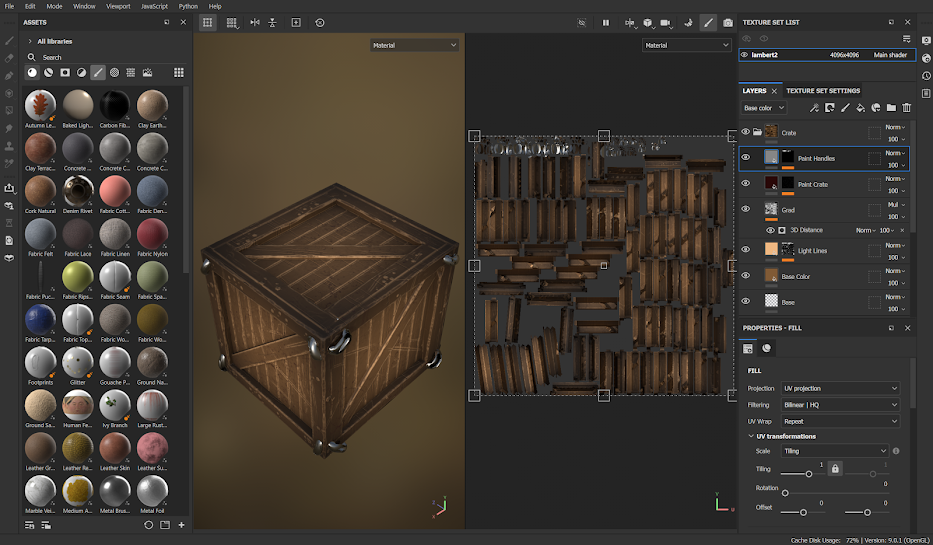
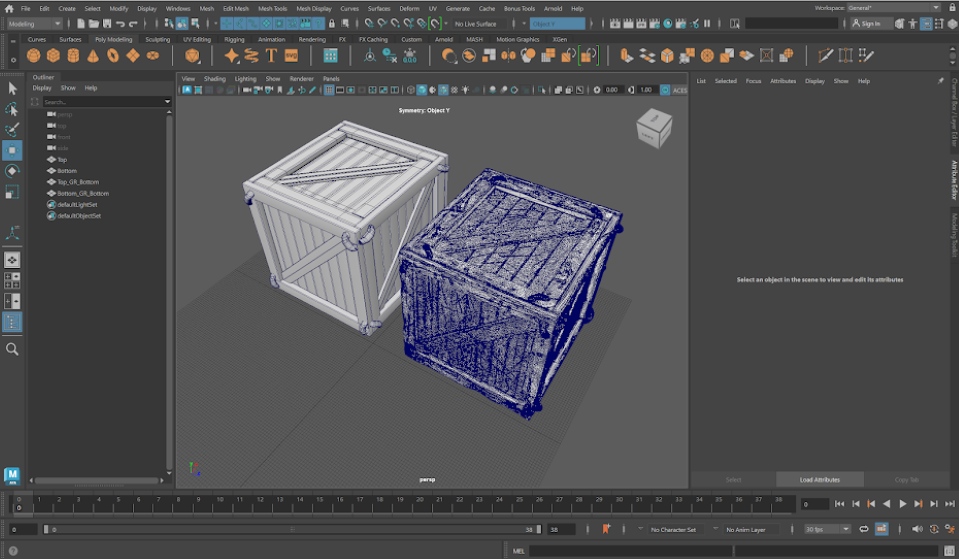
Original Mesh Unity Mesh Collider Optimized Mesh Collider
Triangles Count 9132 tris 2416 tris

The tool uses the Computational Geometry Unity Library by Erik Nordeus 🐐 to perfrom the Quadric Error Metric simplification on the shared mesh of the mesh collider.

Usage

  • Download the collideroptimizationpackage_3d_v004.unitypackage package from the Releases.
  • Import all the assets from the package in your unity project.
  • Attach the MeshColliderOptimizer.cs script on your 2D sprite.
  • Choose the connecting mode between Fast, Precise, and No.
  • Adjust the optimizationFactor to control the amount of optimzation you need.
  • Choose the mesh style to be Soft, Hard or both.
  • Warning: Choosing the “Fast” mode would likely lead to errors, Precise mode is recommended for most of the meshes.
  • Run the performance comparision test on your machine by cloning the project & going to the Mesh Collider Optimization Test scene in Unity.

Updates

  • Added the functionality to save and load the optimized colliders as assets.
  • Fixed the refresh bug.

Contribution

Contributions to the project are welcome. Currently working on converting the QEM algorithm to a couroutine to stop the main Unity thread from freezing.

Known Bugs

  • If a prefab is made out of a gameobject having Polygon Collider Optimizer, it keeps refreshing itself. [FIXED]
  • Choosing Hard Edge Mesh Style decreases the number of triangles but induces additional vertices (doesn’t affect the performance).
C#, Unity

Text to Material - Unity

Generate materials from text prompts in Unity.

Generate materials from text prompts in Unity. Uses chatgpt and dall-e models.

Updates

  • Support for URP and HDRP available now, download from the Releases Section.
  • For URP, import Editor Coroutines into the project from the Package Manager, if it’s not available by default.

Usage

  • Download the .unitypackage from the Releases Section.
  • Create/Login to your OpenAI account and get your API key from here.
  • Import the package in your Unity Project.
  • Go to Project Settings -> T2M -> paste your API key
  • Right click in the Project Window, click on Create - > T2M to open the Text-To-Material window.
  • Enter the prompt describing the type of material and texture of the material you want to create.
  • Choose the model to use, the image size, and the quality (only for dall-e-3) for textures.
  • Click on Generate. The textures and materials are generated and saved in the Assets/T2M Materials folder.

Note

  • gpt-4 and dall-e-3 might not be available for all the users.
  • The resposne generated by AI can sometimes not be in the proper format that we expect it to be for parsing. In such cases, just click on generate again. It works >90% of the time.

Contributing

Contributions to the project are welcome. Currently working on:

  • Support for URP & HDRP materials. [Done!]
  • Support more texture maps. (Bump map, Normal map, Roughness map etc.)
  • Support for materials based on different shaders.
  • Better prompts for texture generation, to ensure seamless textures. [Done!]
  • Support for materials based on custom shaders (ig ambitious).

License

MIT License

Acknowledgement

Thankful to Keijiro Takahashi for his AI Command Project.

C#, Unity

Multi Window Sync - PyQt

Windows GUI multiple window synchronization using PyQt5 and pyqtSignal.

Windows GUI application developed using PyQt5. It demonstrates the synchronization of multiple windows using pyqtSignal. Inspired by the work of Bjørn Staal.

Usage

  • Clone the repository
    git clone https://github.com/aniketrajnish/MultiWindowSync-PyQt.git
    
  • Open Terminal and change directory to the script’s folder.
    cd <path-to-repo>\src
    
  • Install Dependencies
    pip install -r requirements.txt
    
  • Run the main script
    python MultiWindowTest.py
    
  • Use your own image/GIF.
    File -> Open Image/GIF
    
  • In case you don’t wanna go through all of this hassle, I’ve added an executable file in the Releases Section that you can directly try on your machine.

Contributing

Contributions to the project are welcome. Currently working on:

  • Expanding the environment to 3D using PyOpenGL.
  • Fix the bug where the parent image window always moves the image along with it for ref to other windows even if Move With Window is unchecked.

License

MIT License

Python, PyQt5, qtSignal

Hypercasual Games

Hypercasual Games and Prototypes I've worked upon.

Jelly Cleaner

Metrics

CPI : $0.28
D1 : 12%
Usage 24h : 00:42

My Responsibilities:

- Led a team of two and looked after game mechanics, lighting and the overall production of the game and CPI video.
- Wrote Jelly physics algorithms that’s performant over mobile devices using spring joints.
- Wrote a shader for Jelly leveraging the use of perlin noise and sine functions.

Dodge Master

Metrics

CPI : $0.59
Usage 24h : 01:13

My Responsibilities:

- Led a team of three and looked after game mechanics, lighting and the overall production of the game and CPI video.
- Wrote time control and bullet-time destruction mechanic.

Body Adjustment ASMR

Metrics

CPI : $0.76

My Responsibilities:

- Led a team of three and looked after game mechanics, lighting and the overall production of the game and CPI video.
- Wrote skinned mesh deformation and reformation algorithm.
- Developed a mesh outline tool that’s performant on mobile devices

Shoot The Numbers

Metrics

CPI : $1.48

My Responsibilities:

- Led a team of four and looked after game mechanics, lighting and the overall production of the game and CPI video.
- Wrote pathfinding algorithms instead of using Navmesh to increase performance on mobile devices.
- Wrote a shader that supports both transparency and interpolation between two colours.

- Wrote swerve mechanics and mechanics for algebraic gates trending in hypercasual games back then.

Human Canon

Metrics

CPI : $2.36

My Responsibilities:

- Led a team of three and looked after game mechanics, lighting and the overall production of the game and CPI video.
- Worte ragdoll crowd control mechanics.
- Wrote canon projectile mechanics.

- Wrote a low poly water shader.
- Optimized clouds by using raymarched clouds from the raymarching engine I developed instead of particle based clouds.

Hoof Cleaning ASMR

Metrics

CPI : $0.89

My Responsibilities:

- Led a team of two and looked after game mechanics, lighting and the overall production of the game and CPI video.
- Wrote texture masking algorithm to erase / paint textures over meshes.

Faster Than Light Hypercasual

Metrics

CPI : $0.58

My Responsibilities:

- Led a team of three and looked after game mechanics, lighting & shaders, UI design, sound design, and the overall production of the game.
- Won the JAMBOOST game jam hosted by Chartboost and a prize of 1000$.
- Optimized indoor lighting on mobile platform using baked lighting.
- Programmed every mechanic & enemy AI of the game.

Game Pitches

I have conceptualized and presented these hypercasual game pitches.


C#, HLSL, Unity, Game Design

VFX - Capstone Project

My contributions to the FIEA Capstone Project - Chroma.

Comical Post Processing Effect

Chroma’s art direction was to make the game look comical in a confomist environment, showing the contrast between the character and the world. To sell this idea, I developed a post processing effect that gives the game a comic book like look. Below is the video of the effect in action and also a breakdown of the effect.

  • I first made a outline shader to make certain points of interset like pop out. Since we had a lots of points of interest I decided to create a post processing effect that gets applied to a custom stencil and then the outline shader is applied to the stencil, this way we can control which parts of the scene get the outline effect. This presented two disadvantages:

    • The outline effect was rendering top of other objects and was not being occluded by them.
    • The outline effect looked same on all objects. To solve the first problem I implemented an occlussion mask that used the depth buffer to check if the pixel is occluded by another object and not render the outline there. I’m still working on the solution for the second problem.
  • I then created a higlight overlay material by using a Fresnel effect as the opaciy mask and the the amount of highlight covered by the Fresnel effect is controlled by using World Position Offset. This overlay material is added on certain objects to give it a comical hit effect.

  • Then I took the shadow information from the scene as texture by subtracting specular and base color from the scene color, converted it to a mask and overlayed hatching lines over it.
  • Finally I did the same thing to make an emissive mask and overlayed a halftone pattern over it.

Glitch Post Processing Effect

The goal was to establish a spiderverse-inspired glitchy look to some of the VFX associated with the main character’s abilities. I developed a post processing effect that gives any object on a custom stencil a give a glitchy look. The VFX is yet to implemented in the game but the effect can be seen in the video below.

Artist Tool - Auomated Maya Model Showcase

Seeing the need of the artists to display their models often in a specified format by the leads, I developed a tool for them that automates this process and helps them diplay their models in the specified format just by one click of a button.

  • The tool creates a camera animation that goes around the model.
  • The camera is keyframed at 45 degree intervals and the tool adjusts the camera position and rotation to make the model always in the view of the camera and centered.
  • The display mode is alternated between wireframe and smooth shaded, and both modes are displayed for each angle.
  • I made this tool open source and it can be found here.

UE5 Shockwave Tool

I was presented with a situation where our team needed to create shockwave effects at various places in the game, like in the levels, from the enemies, in between the player reload animation, as a ripple etc. I proposed creating a tool that lets us create shockwave between multiple points and using that tool to create the shockwave effects for all the purposes.

Heatwave Effect

I developed an algorithm that creates a heatwave distortion effect and extend this algorithm to create 3 different ways to add this effect to the level:

  • As a on-screen post processing effect that applies to the whole screen.
  • As a meaterial that can be applied to mesh of different shapes to govern the area of effect.
  • As a particle system to add more behavior to the effect.

Optimized Alembic Curly Hair

We had to implement curly hair for the main character of the game, keeping in mind that it shouldn’t have a lot of performance overhead. I used the groom plugin in UE5 to import an alembic cache as a hair component. I optimized the hair by:

  • Dividing the hair into buns, modelling just one bun having fewer than 500 particles in blender and using GPU Instancing to render multiple copies of the buns. This sacrificed the variety of buns but it was not of importance to us. This gave us a performance boost of 4x (1x for each bun).
  • Giving the hair material just a simple gradient between two colors from top to bottom. The hair material was also changed to a masked material that subdivided each strand into 8 different strands, faking 4000 strands for each bun from the 500 strands giving us a performance boost of 8x.
  • Disabling hair physics and manually keyframing each bun, adding to the comical look of the game, and drastically reducing the performance overhead. This gave us a performance boost of ~2x.
  • In total we got a performance boost of 8x * 4x * ~2x = ~64x.

Death Dissolve Effect

I developed a death dissolve effect for the enemies in the game.

Unreal Engine, Material Graph

4D Engine - Unity

A 4D Raymarching Engine for Unity that helps render 4D objects in Unity's 3D space.

A 4D Raymarching Engine for Unity that helps render 4D objects and has the following features:

  • 20+ 4D shapes to choose from.
  • Control over shape’s dimensions and color.
  • Control over shape’s 3D translation and rotation.
  • Supports ambient occlusion, lighting information, hard and soft shadows.
  • Control over both global and local 4D translation and rotation.

I have made a 4D pacman game using this engine. You can check it out here.
If you want to learn more about what 4D is, check out this video that I made using this engine as the backend.

Usage

Importing the Package

  • Clone the repository or download the .unitypackage from the Releases Section and import it in your project.

    git clone https://github.com/aniketrajnish/4D-Engine-Unity.git
    
  • Import the Unity.Mathematics package from the package manager.
  • The package includes a pre-configured Test scene that serves as a reference. You can use this as a starting point for your project.
  • If you want to setup a new scene by yourself, simply follow the steps outlined below.

Setting up a scene

  • Open a new scene and add the Raymarcher component to the Main Camera.
  • The Raymarcher script has the following parameters in the inspector:

    Category Variable Description
    General Settings Shader Shader used for raymarching.
    Sun Directional light in the scene.
    Loop Repetition of structures in the raymarching shader.
    4D Settings W Pos Global W position in 4D space.
    W Rot Global W rotation in 4D space.
    Light Settings Is Lit Toggle lighting calculations on/off.
    Is Shadow Hard Toggle between hard and soft shadows.
    Is AO Enable or disable Ambient Occlusion.
    Light Col Color of the light.
    Light Intensity Intensity of the light.
    Shadow Intensity Intensity of shadows.
    Shadow Min Minimum shadow distance.
    Shadow Max Maximum shadow distance.
    Shadow Smooth Smoothness of shadow edges.
    AO Step Step size for AO calculation.
    AO Intensity Intensity of AO.
    AO Iteration Number of iterations for AO calculation.
    Render Settings Max Steps Maximum number of steps for raymarching.
    Max Dist Maximum distance to raymarch before considering a hit.
    Surf Dist Threshold for considering a hit in raymarching.

Rendering a shape

  • After adding the Raymarcher component to the Main Camera, create an empty gameobject and add the RaymarchRenderer component to it.
  • Click the Create New Dimensions button to create a scriptable object containing all the data about the shape’s dimension that you can control using the custom editor for each shape.
  • The RaymarchRenderer script has the following paramters in the inspector:

    Category Variable Description
    Default Inspector Shape 4D shape to be rendered.
    Operation Operation to be performed (union, subtraction, intersection).
    Color Color of the shape.
    Rot W Local W rotation in 4D space.
    Pos W Local W position in 4D space.
    Blend Factor Currently not implemented.
    Dimensions Scriptable Object holding the shape’s dimension data.
    Create New Dimensions Button to create new dimenion scriptable object for the shape
    Shape Dimensions Dimension Props The dimension properties based on the chosen 4D shape.

Contributing

Contributions to the project are welcome. Things that need work:

  • Currently operations triggers global operation on the last object. Need to change it to local operations with the objects in proximity/chosen objects.
  • Make a better collision detection system.
  • Implement a system to blend different shapes.
  • Implementing n-dimensional rigid body dynamics.

License

MIT License

C#, Unity, HLSL

Spiderverse Post Processing

Spiderverse inspired stylized post-processing effect for Unreal Engine and Unity.

Spiderverse-inspired stylized post-processing effect for Unreal Engine and Unity.

Usage

Unity

  • Download the .unitypackage from the Releases Section.
  • Open/Create a new URP Unity project.
  • Import the package into the project.
  • Enable the Stylized Renderer Feature in your URP Renderer (generally in Assets/Settings folder) by adding the Stylized Renderer Feature to the Renderer Features.
  • Control the Renderer Feature’s properties by adding a Global Volume component to your scene.
  • Add Makra/Stylized PP override to the Volume component. The custom post-processing contains the following components-

    Property Description
    Threshold Minimum brightness for the effect to be applied.
    Intensity Strength/Brightness of the effect.
    Scatter How much screen space the effect occupies.
    Dots Density Density of the benday dots.
    Dots Cutoff Cutoff value of benday dots.
    Scroll Velocity Velocity of the dots scrolling over the screen.
  • You can use the Unity Project in src/UnityStylizedPP for reference.

Unreal Engine

  • Download the Unreal Project from the Releases Section.
  • Use the map in the Unreal Project as a reference.
  • To implement the stylized post-processing in your project, migrate the Content/StylizedPP from the project you downloaded above to your Unreal Project.
  • Add a PostProcessVolume component to the level.
  • Make sure that Infinite Extent is checked in the Post Process Volume Settings.
  • Assign the M_PP_Stylized_Inst material to the Post Process Materials.
  • Control the post process properties by going to thet M_PP_Stylized_Inst and changing the following parameters-

    Property Description
    Benday Clip Minimum brightness for the effect to be applied.
    Density Benday Density of the benday dots.
    Density Line Density of the hatching lines.
    Direction Benday Direction of Benday Pattern.
    Direction Line Direction of Hatching Pattern.
    Spec Mult Intensity and spread of specular highlights.
  • To create a stencil mask for the benday dots to be applied only on specific objects, go to project settings and change the Custom Depth-Stencil Pass to Enabled with Stencil.

  • In the mesh that you want to render the benday dots upon, enable the Render CustomDepth Pass option and change the Custom Stencil Value to 1.

Contributing

Contributions to the project are welcome. Currently working on:

  • Fixing glitches with persistent shadows in UE5.
  • Add hatching lines to the shadows in Unity.

License

MIT License

C#, Unity, HLSL, Shader Graph, Unreal Engine, Material Graph

Trippy Post Processing

A trippy post-processing and render feature for Unity's URP.

A trippy post-processing and render feature for Unity’s URP based on Sobel Filter Edge Detection. I wrote this so that the next time I get high, I would work on projects with this ON :]

Usage

  • Download the .unitypackage from the Releases Section.
    • Trippy_PP_min_v001.1.unitypackage just contains the backend for the post-processing.
    • Trippy_PP_all_v001.1.unitypackage contains the backend as well as a demo scene with the implementation for reference.
  • Open/Create a new URP Unity project.
  • Import the package into the project.
  • Enable the Trippy Renderer Feature in your URP Renderer (generally in Assets/Settings folder) by adding the Trippy Renderer Feature to the Renderer Features.
  • Control the Renderer Feature’s properties by adding a Global Volume component to your scene.
  • Add Makra/Trippy override to the Volume component. The custom post-processing contains the following components-

    Name Description
    Enable Effect Toggles the effect on or off.
    Intensity Intensity of the Trippy effect.
    Edge Color Color of the edges.
    Edge Width Width of the edges.
    Base Color Base color of the environment.
    Use Gradient Toggles if a gradient texture is used as the edge color.
    Gradient Tex The gradient texture to be used.
  • If you wanna have some fun consider adding the TrippyVolumeAnimator.cs script to the Volume component ;)

Contributing

Contributions to the project are welcome. Currently working on:

  • A better algorithm for edge width calculation.

License

MIT License

C#, Unity, HLSL

Raymarching Engine - Unity

A raymarching engine for Unity that supports 28+ primitives and set operations.

A fast GPU-accelerated raymarching engine for Unity with support for over 28 primitives (including fractals, n-dimensional objects, volumetric clouds) and set operations (Union, Subtract, Intersect). Includes a custom interface for manipulating shader parameters through the editor.

Updates

v002

  • The engine now stores the dimensions of the shapes as scriptable objects, to keep multiple instances of same shape persistant across sessions.
  • Added support for Ambient Occlussion, Hard/Soft Shadows and various render setting exposed for the users to play around with.
  • Download the .unitypackage here.

Rendering the shapes provided

1. Using an Image Effect Shader

  • Attach Raymarcher.cs to the Main Camera and RaymarchRenderer.cs to an empty gameobject.
  • Drag the ImageEffectRaymarcher.shader in Shader field of Raymarcher.cs in inspector and direction light to the Sun’s transform field.
  • Click on Create New Dimensions in the RaymarchRenderer.cs to create a scriptable object to hold the dimesnion data of the shapes.
  • You can control the following settings for the raymarching using the Raymarcher component-

    Category Variable Description
    General Settings Shader Shader used for raymarching.
    Sun Directional light in the scene.
    Loop Repetition of structures in the raymarching shader.
    Light Settings Is Lit Toggle lighting calculations on/off.
    Is Shadow Hard Toggle between hard and soft shadows.
    Is AO Enable or disable Ambient Occlusion.
    Light Col Color of the light.
    Light Intensity Intensity of the light.
    Shadow Intensity Intensity of shadows.
    Shadow Min Minimum shadow distance.
    Shadow Max Maximum shadow distance.
    Shadow Smooth Smoothness of shadow edges.
    AO Step Step size for AO calculation.
    AO Intensity Intensity of AO.
    AO Iteration Number of iterations for AO calculation.
    Render Settings Max Steps Maximum number of steps for raymarching.
    Max Dist Maximum distance to raymarch before considering a hit.
    Surf Dist Threshold for considering a hit in raymarching.
  • You can control the following properties of the individual shapes using the RaymarchRenderer componnent-
    Category Variable Description
    Default Inspector Shape Shape to be rendered.
    Operation Operation to be performed (union, subtraction, intersection).
    Color Color of the shape.
    Create New Dimensions Button to create new dimenion scriptable object for the shape
    Dimensions Scriptable Object holding the shape’s dimension data.
    Shape Dimensions Dimension Props The dimension properties based on the chosen 4D shape.

Rendering a custom shape

  • Append the distance function of the shape in DFs.cginc like
      float sdShape(float3 p, // dimension parameters)    
      {
          // distance function here
      }
    
  • Append the distance function created above in GetDist() in the ImageEffectRaymarcher.shader.
      float GetDist(Shape shape, float3 p) {
          switch (shape.shapeIndex) {
          case n:
              return sdShape(float3 p, // dimension parameters);
          }
      }
    
  • Add the shape data in the scriptable object ShapeDimensions.cs
    public float shapeDimension = default dimenison
    
  • Add the shape in Shape enum in RaymarchRenderer.cs
      public enum Shape {
          // shape name
      };  
    
  • Make the dimension array in Helpers.cs to be sent as a compute buffer to the Raymarching shader.
      public static vector12 GetDimensionVectors(int i)
      {
          //dimension vector12 object
      }
    
  • Finally make a custom editor for your shape in the PropertiesEditor.cs

      public override void OnInspectorGUI()
      {
          base.OnInspectorGUI();
          RaymarchRenderer renderer = (RaymarchRenderer)target;        
    
          if (GUILayout.Button("Create New Dimensions"))
             renderer.dimensions = CreateShapeDimensionsAsset();
    
          if (renderer.dimensions == null)
             return;
    
          switch (renderer.shape)
          {
              //property editor here
          }
      }
    
C#, Unity, HLSL

3D Shapes Dataset Generator

Helps procedurally generate tailored 3D shape datasets.

This tool is designed to help users create procedurally generated 3D shape datasets customized to their needs. It’s built on top of my open source Raymarching Engine and runs over GPU. The engine supports over thirty primitives, three set operations (Union, Intersection, and Subtraction), and varying color values (along with shadows).


A glimpse of the Final Dataset


Sample image with operations: Cone (Union) + Sphere (Union) + Box Frame (Subtraction)

Getting Started

  • Download the build file/windows installer from the Releases.
  • If you need over the top features -
    • Clone the repository
      git clone https://github.com/aniketrajnish/3D-Shapes-Dataset-Generator.git
      
    • Open and edit the source code (in the /src folder) in Unity 2020.3.30f1 or later.

Usage

  • Varying Camera Angle (currently not functional): Set to True if you want to assign a different camera angle to each image in the dataset. Otherwise, the camera will look at the object keeping it in the center using transform.LookAt().
  • Varying Orientation: Set to True if you want to assign a unique random orientation (angle) to the individual shapes in the dataset. Otherwise, the shapes will be aligned with the axis using Quaternion.identity.
  • Varying Position: Set to True if you want to assign a unique random position to the individual shapes in a cube of dimension 2 units centered at the origin. Otherwise, the shapes will be centered at the origin.
  • Randomize Shape Count: Set to True if you want to randomize the number of shapes in each image between 0 and the Max Shape Count. Otherwise, every image will be generated with Max Shape Count number of shapes.
  • Max Shape Count: Set the maximum number of shapes that each image in the dataset should have.
  • Dataset Size: Set the number of images to be generated in the dataset.
  • Dataset Path: Set the path where the dataset folder is to be created.
  • Resolution: Set the width and height of the images (in pixels) to generate them accordingly.
  • Shapes and Operations: These are enums that determine which shape index and operation index are to be taken into * consideration while generating each shape.
  • Seed: Input a seed value to generate a dataset that has already been created before by assigning the seed value to the Random State.

Note that the Varying Camera Angle parameter is still under development and is not functional.

Datasets

  • The images are saved in the ../images folder.
  • The seed value of each random state is also exported in a txt file and can be used to re-generate a dataset.
  • These parameters are exported in the CSV sheet with all the image information as shown in table below.
    Column Name Info
    filename Name of the image file
    shape Shape Index
    operation Operation Index
    a,b,c,d,e,f,g,h,i,j,k,l Dimensional parameters
    hue, sat, val HSV Values of the color
    rot_x, rot_y, rot_z Euler Angles
    pos_x, pos_y, pos_z Position Vector
  • Each row depicts information about a shape in the image of a dataset.

Contributing

If you find a bug or have a feature request, please open an issue or submit a pull request.

C#, HLSL, Unity

Alembic to FBX Converter

Converts Alembic files to FBX files.

A python script that converts an Alembic file to animated FBX files using Maya while retaining the texture information.

Usage

  • Clone the repository
     git clone https://github.com/aniketrajnish/Alembic-to-FBX-File-Maya.git
    
  • Import the alem_to_fbx.py script into Maya.
  • Import the alembic file into Maya.
  • Select the alembic node and run the python script.
  • To export the texture information along with the mesh, change to blinn/lambert materials.

Contribution

Contributions to the project are welcome. Currently working on:

  • Changing the FBX import preset through the script itself. [Done!]
  • Exporting blend shapes with a single mesh file for the alembic files with same topology across the animation cycle.
  • Supporting bigger files.
  • Exporting texture information. [Done!]
  • Ability to work with multiple Alembic nodes at once. [Done!]

License

MIT License

python, maya, pymel

Gamejam Entries

My participation in various gamejams.

Two Opposites


Brackeys Gamejam 2021.1

  • Total Particpants: 10000+
  • My Rank: 22 (Innovation), 44 (Game Design), 71 (Overall)

About the game:

  • Two opposites is a game about the journey of two opposites (characters with mirrored controls) separated by a mirror.
  • Players need to solve puzzles to escape the mirror world and finally meet each other. However, the challenge lies in the fact that they can only solve these puzzles together.

My Responsibilities:

  • Led a team of three and looked after game mechanics, lighting & shaders, UI design, sound design, and the overall production of the game. Made within a week
  • Programmed every mechanic of the game which included, but not limited to mirror movement, multiple camera setup, etc.
  • Formulated and developed a 2D Lighting System in C# for Unity using raycasts and Unity started official support for it in a later update.

Faster Than Light?


Brackeys Gamejam 2020.2

  • Total Particpants: 9000+
  • My Rank: 71 (Audio), 132 (Overall)
  • Popularity Rank: 3rd

About the game:

  • To ‘REWIND’ the time one has to achieve the speed of light. Can you?
  • Corona has taken over the world. Vaccines have failed to stop it. Scientists have figured out that the only option left is to travel back in time and stop the root cause of the virus. To ‘REWIND’ the time one has to achieve the speed of light. Can you? 5/5 people who play-tested it couldn’t do so :P

My Responsibilities:

  • Led a team of three and looked after game mechanics, lighting & shaders, UI design, sound design, and the overall production of the game. Made within a week
  • Programmed every mechanic & enemy AI of the game.
  • Developed player physics in 48 hours, allowing for timescale-independent movement in space, timescale manipulation, & bullet-time mechanics.

ARE YA WINNING, SON?


Brackeys Gamejam 2020.2

  • Total Particpants: 20000+
  • My Rank: 223 (Presentation), 725 (Overall)

About the game:

  • A game in which the AI won’t let you win!
  • The A.I. of this game has taken over and the game is OUT OF your CONTROL and he challenges that he won’t let you win.

My Responsibilities:

  • Led a team of three and looked after game mechanics, lighting & shaders, UI design, sound design, and the overall production of the game. Made within a week
  • Became proficient in generating ideas & quickly prototyping them in Unity.
  • Developed shaders & implemented post-processing effects to create a CRT TV aesthetic, gaining technical expertise in implementing visual effects.

Faster Than Light Hypercasual

JAMBOOST Gamejam

Total Particpants: 305
My Rank: 1
Prize Won: 1000$


My Responsibilities:

- Led a team of three and looked after game mechanics, lighting & shaders, UI design, sound design, and the overall production of the game.
- Achieved a CPI of $0.58.
- Optimized indoor lighting on mobile platform using baked lighting.
- Programmed every mechanic & enemy AI of the game.

Doge To The Moon

Opera GX Gamejam

Total Particpants: 5000+

My Responsibilities:

- Led a team of two and looked after game mechanics, UI design, sound design, and the overall production of the game.
- Learnt and developed in over the weekend in GameMaker.

C#, HLSL, Unity, GameMaker, GameJam, Game Design

Spongebob VR Project

a Spongebob VR experience created in Unreal Engine 5.

Created a Spongebob VR experience in Unreal Engine 5 with a team of 4 artists. I was responsible for the lighting, post-processing, animation state machines, rigging and the overall blueprinting of the project.

Proxy Pass
This week I worked on-

  • Enhancing the visual aesthetics of the scene through lighting and post-processing effects to give it a blue underwater ambience.
  • Rigging and creating the animation state machine for the SpongeBob hands.
  • Creating the animation state machine for the breaking animation of the SpongeBob hands.
  • Setting up trigger volumes to initiate the breaking animation of the SpongeBob hands.
  • Creating parent materials for the scene and props to make them modular.
  • Placing the navmesh for teleportation.

env light 1 env light 2
Environment Lighting


Rig
Rigged Spongebob hands

ABP 1 ABP 2
Animation Blueprint


break-trigger
Break Trigger


parent-material
Parent Material


Navmesh
Navmesh

Clean Pass
This week I worked on-

  • Fixing the physics collisions between objects.
  • Fixing the teleportation mechanic.
  • Doing a second pass on the lighting.
  • Implementing grabbing and snapping of props.


Teleportation
Fixing collision and teleprtation mechanic

clean light clean light
Second Lighting Pass

grab snap
Grab & Snap for Props

Environment Final Pass
This week I worked on-

  • Final pass on the lighting by simulating fake lighting using emissive materials.
  • A blueprint to open and close the cabinet.
  • Final pass on the animation blueprints to fix the hand breaking upon trigger.
  • Fixing the spatula grab pose using animation state machine.
  • Final pass on the modular parent material for the scene and props.

Final Lighting Final Lighting Final Lighting
Final Lighting Pass


door-open-close
Door Open & Close Blueprint

ABP Fin 1 ABP Fin 2
Final Pass - Animation Blueprint


spat-fix
Spatula Fix

Mat Fin 1 Mat Fin 2
Final Pass - Modular Parent Material

Character Final Pass
This week I worked on-

  • Animation blueprint of all the characters.
  • Animation state machine of all the characters.
  • Added behaviour to the sauce bottle.
  • Added audio triggers in the scene.
  • Worked on Fluid VFX which somehow didn’t work in VR.

Character ABP 1 Character ABP 2 Character ABP 3
Character Animation Blueprints & Animation State Machines

Audio Trigger 1 Audio Trigger 2
Audio Triggers

Fluid 1 Fluid 2 Fluid 3
Fluid VFX
C#, HLSL, Unity, VR, Game Design

Maya Auto Rigger

A WIP Auto Rigger for Maya built on PySide2/PyQt5.

WIP

Python, Maya, pymel, PyQt5, PySide2

Math Tools & Libraries

Mathematical tools, libraries and gists that I have worked upon.

Matrix Calculator

  • A visusal matrix calculator that helps showcase the following concepts:

    • Basic operations like addition, subtraction, scalar & matrix multiplication, transpose, and inverse on matrices.
    • 3D transformations like scaling, rotation, and translation.
    • World Spcae Transformation, Object Space Transformation, Camera View Matrix, Projection Matrices and Model View Matrix.
  • The calculator is built on top of my C# Matrix Library whose source code can be found here.

  • The GUI is developed using Unity3D and is deployed using WebGL and GitHub Pages. The source code for the whole project can be found here.

Triangle/Trigonometry Visual Calculator

  • A triangle calculator that calculates the sides and angles of a triangle using:
    • SOH-CAH-TOA
    • Law of Sines, Law of Cosines
  • The calculator is built on top of my python trigonometry library whose source code can be found here.
  • It is built using PyQt5 and the packed executable can be found in the Releases Section of the repository.
  • The triangles are visualized using the QGraphicsView and QGraphicsScene classes of PyQt5.

Quaternion Python Library

  • A python library that helps in performing quaternion operations like:
    • Addition, Subtraction, Scalar & Quaternion Multiplication
    • Conjugate, Inverse, Normalization, Negation, Angle-Axis Representation
    • Slerp, Point Transformation
  • I plan to create a visual calculator for the same using PyQt5 similar to the Triangle Calculator.

C# Shader Math Library

  • Gist of C# functions that adds on to the Unity.Mathematics library to add additional shader math functionality to it like:
    • dot2, ndot
    • union, intersection, difference
    • Fmod, 4D Transformations

HLSL Signed Distance Functions

  • Collection of HLSL definions of Signed Distance Functions representing various 4D implementation of shapes like:
    • Sphere, Torus, Capped Torus, Link, Plane, Cone, Infinite Cone, Hexagonal Prism, Triangular Prism, Capsule, Infinite Cylinder, Box, Rounded Box, Rounded Cylinder, Capped Cone
    • Box Frame, Solid Angle, Cut Sphere, Cut Hollow Sphere, Death Star, Round Cone, Ellipsoid, Rhombus, Octahedron, Pyramid, Quad, Triangle, Fractal
    • Tesseract, HyperSphere, DuoCylinder, Five-Cell, Sixteen-Cell
  • Collection of SDFs for regular 3D shapes can also be found here

C# 4D Signed Distance Functions

  • Collection of C# analogs of the HLSL Signed Distance Functions for 4D shapes.
  • These are just limited to the 4D shapes, will expand to regurlar 3D shapes soon.
C#, Python, PyQt, 3D Math, Trigonometry

more work

The rest of the mess..

Games for community

Took burts of week-long solo projects to publish a game in a week for my undergraduate college community to play and compete in. The competion was known as PlayPro and saw participation by 400+ people for each game. I published the following games for this purpose. For these games I implemented an leaderboard using dreamlo:

1. Banana Warrior


Menu
Menu
Leaderboard
Leaderboard

2. Fertilize.io


Menu
Menu
Gameplay
Gameplay
Death Screen
Death Screen

3. 2048 Jelly


Menu
Menu
Gameplay
Gameplay

4. Toilet Spinner


Menu
Menu
Leaderboard
Leaderboard

5. Chrome Dino Remastered
Developed this to learn Pocket Code - A visual scripting based game development app on android.


Menu
Menu
Gameplay
Gameplay

6. Return To Monke


Menu
Menu
Gameplay
Gameplay

7. Obamium Maker


Placeholder
Placeholder
Textured
Textured

Update: Most of these apps were removed from the Play Store as they used a deprecated Unity Ads SDK that didn’t align with the store’s policy. Remember, don’t be greedy, folks!

Crate Project

  • Created this realtime prop following the entire 3D art asset creation pipeline going through proxy, high-res and game-res modelling phases.
  • Textured the asset, created an inifinte wall and product shot lighting setup in Unreal Engine 5.
    Final Crate Render
    Final Crate Render

Proxy Shot1 Proxy Shot2
Proxy and Game-Res Crate Model


Highres Shot1
High Resolution Sculpting Model


Tex&Mat Crate Highres Shot1
Substance Painter Texturing UE5 Material Node


Crate UV High&Game Res
UV Unwrapping High-Res and Game-Res Mesh

Mesh To Point Cloud Tool for Houdini

A python shelf tool to convert mesh to point clouds using Houdini.

  • It uses a scatter node to scatter points on the mesh.
  • It retains the color and UV info using attribfrommap node and the mesh’s texture that it searches for automatically.

Soul Shard

soul-sh

  • Assisted the Cohort-18 19SOB team at FIEA with their capstone project as a tech artist & designer for shader & gameplay programming, whilst developing various Particle & VFX systems.
  • Provided assistance in shader & gameplay programming, and the development of particle & VFX systems.
  • Developed a dynamic footprint system for main characters and VFX effects such as stylized fire, smoke, debris, and flames.
  • Created a dynamic snowstorm system and implemented rope physics for cables, as well as a dynamic loading screen for various scene transitions.
  • Curated development logs and documentation about my contribution that can be found here.

Optimized Bullet-Time Destruction Pipeline in Unity


Front Flip Animation State Machine & IK Rig in Unreal Engine


Project Holly

Created an interactive movie experience using Unity. For this project, I developed an asset that allows one to stream a video in small chunks accroding to the user’s choices. This allows you to take control of the characters and make choices on not only the direction of the narrative of the film but also fine control on the character’s movement. You can try the demo here.


Mathematical Model for Rendering using Gaussian Elimination

Mathematically modeled and implemented a 3D rendering technique that uses numerical methods to calculate the intersection of planes and render 3D objects. Extended this approach to render the 3D projection of 4D hypercubes.


Rotating Hypervube
Rotating Hypervube
Rotating Cube
Rotating Cube

ASCII Line Art

  • Made ASCII Line art for all my dear professors and mentors on Teacher’s Day.
  • I made 52 of these in total.

    Chris Sir
    Chris Sir
    Rick Sir
    Rick Sir
    Ron Sir
    Ron Sir
  • These were made using p5js by detecting changes in the overall RGB values of different parts of images.

      //text to be used in the image
      const name = 'chrisroda';
    
      function draw() {
    
      //setting background to black
      background(0);
    
      let w =  width / img.width;
      let h =  height / img.height;
      img.loadPixels();
    
      //iterating through pixels and assigning letters based on average rgb values
      for (let i = 0; i < img.width; i++) {
          for (let j = 0; j < img.height; j++) {
          const pixelIndex = (i + j * img.width) * 4;
          const r = img.pixels[pixelIndex + 0];
          const g = img.pixels[pixelIndex + 1];
          const b = img.pixels[pixelIndex + 2];
          const avg = (r + g + b) / 3;
    
          noStroke();
          fill(255);
    
          const len = name.length;
          const charIndex = floor(map(avg,0,255,len,0));  
    
          textSize(w);
          textAlign(CENTER, CENTER);
    
          //edge detection (hardcoded)
          if(avg > 100 && avg < 180)     
              text(name.charAt(charIndex), i * w + w * 0.5, j * h + h * 0.5);     
    
          }
      }
      }
    
  • If you zoom onto the images (by clicking on them), you’ll find out that the pixels of the images are converted into letters of the name of the person that it’s made for.

  • Many of these images were converted into DXF format and engraved on acrylic sheets to be gifted to the professors.
    Engraved Images
    Engraved Images

Procedural Generation of 3D space from 2D map using Raycasts

Developed a 3D Renderer in Scratch using principles of raycasting, with features such as varying FOV and shadow-mapping. Any 2D map input gets converted into a procedurally generated 3D world.

2D Image to 3D Map
2D Image to 3D Map

Unity First!

Tried using Unity & Blender for most of my assignments instead of softwares like AutoCAD and Matlab.

4 Bar Mechanism in Unity

Tried Proving CodeParade wrong :3

Made a go-kart!!

Built this in a team of 10!!

Go Kart

VFX and Edits


Remade Dani’s games

Remade Dani’s Flash Gamesh amassing 1M+ plays and 15k+ views on YouTube and recognition from Dani himself. Watch here.

C#, HLSL, Unity, GameMaker, GameJam, Game Design